Step by Step Tutorial for iMovie for PC
In this page, you’ll learn about how to use Movavi Video Editor to make videos with ease.
Phase 1: Start Your Project & Import Media
Your videos will be organized by projects. Every project can be exported to a video online or on your PC. It’s also a good idea to divide your large video project into small project for smoother editing. During the trial period (before activating with a license key), your video will be created with a watermark. DO remember to save your project to your local folder on your PC. This way, you don’t need to create your video from scratch after purchasing. Instead, open the saved project and export to a video without watermark, after you buy a license key and activate Movavi Video Editor.
Step 1: Create Your First Project
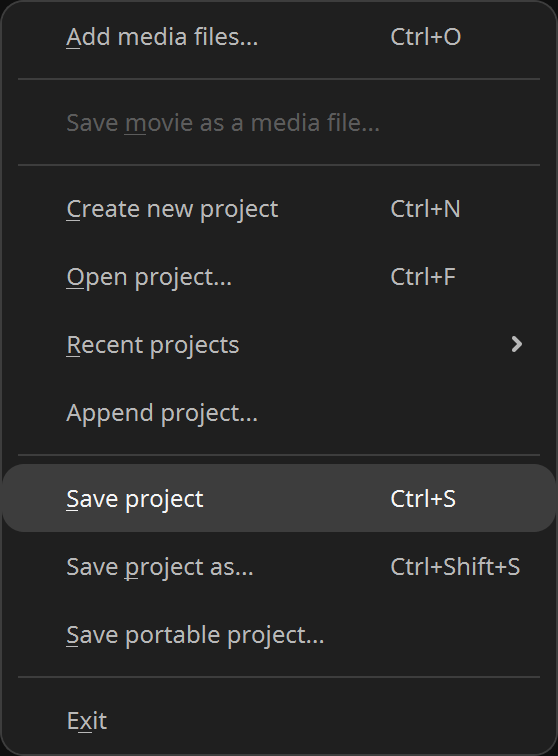
Upon launching this iMovie for PC video editor, you’re editing a new project. Give a name to store it on your PC anytime you want by clicking Ctrl + S, or go to File > Save Project. As you can see, it’s very convenient to open your edited Movavi projects by going through File > Recent projects.
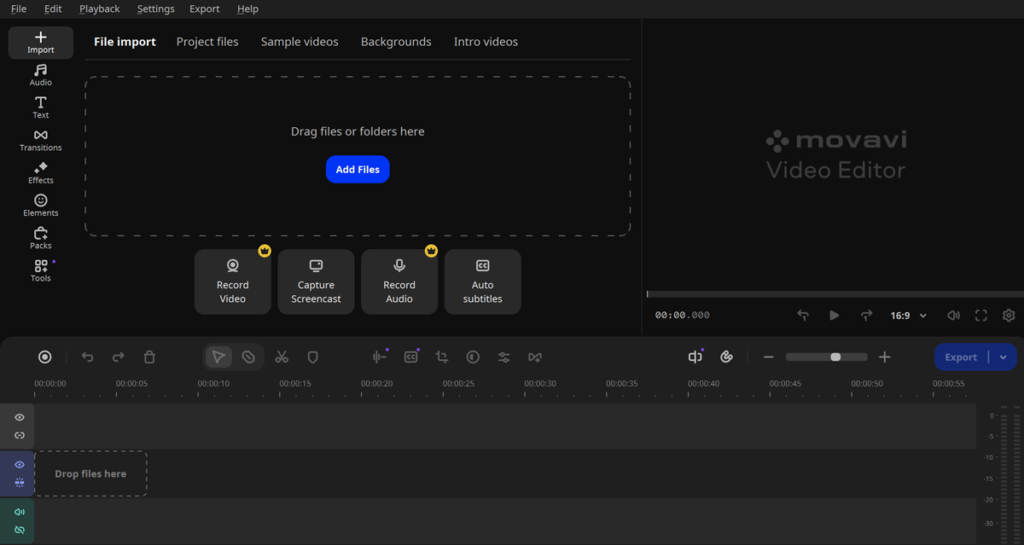
Step 2: Import Your Clips & Photos
Click the “Add Files” button or simply drag and drop your videos, images, and audio files directly into the Media Bin. Movavi supports all common media formats.
Pro Tip: Use the “Record Video ” button to capture video from your webcam or an external device.
Phase 2: The Editing Process: Simple & Powerful
Step 3: Build Your Timeline
This is your creative canvas. Drag items from the Media Bin down to the timeline at the bottom. Arrange clips in the order you want them to play.
- To Trim a Clip: Mouse over any video/photo clip on the time, when the <|> icon appears at its start or end, drag to cut the beginning or ending.
- To Split a Clip: Move the playhead to where you want to cut, and click the “Split” icon (scissors).
- To Cut A Video with Blade: Quickly cut a long clip and remove unwanted parts.
Step 4: Add Transitions, Titles & Effects
- Transitions: Click the “Transitions” tab on the left. Drag your favorite transition effect (like Fade or Blur) between two clips on the timeline.
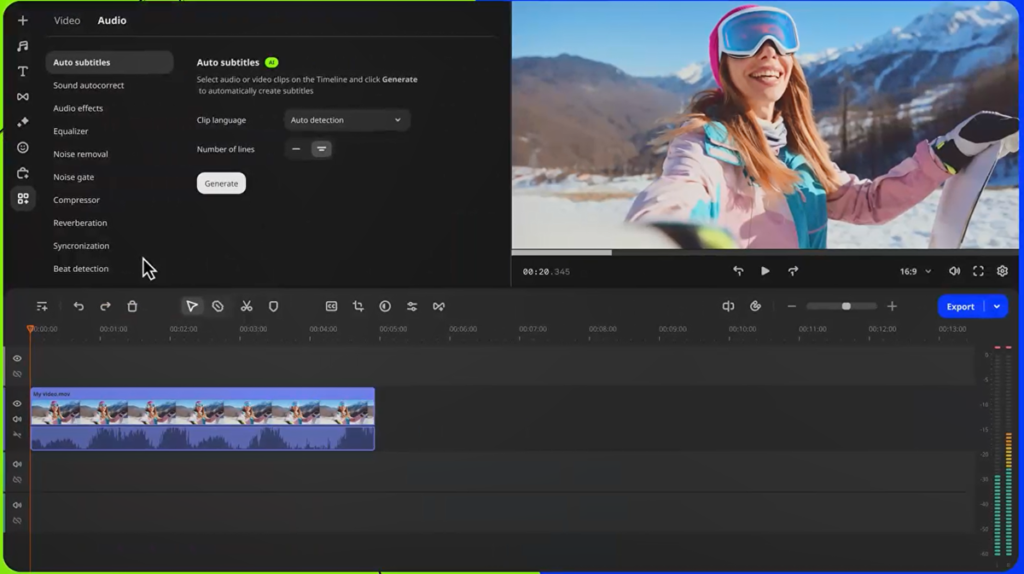
- Titles & Text: Click the “Text” tab on the left. Choose a title preset, drag it onto the timeline above your video, and double-click to customize your text, font, and color. If you’re editing a speech video, now it’s extremely easy to add subtitles with the Auto Subtitle thanks the latest AI technology. Simply go to Text > Auto Subtitles, and give it a try.
- Filters & Effects: Explore the “Effects” tab on the left. You’ll see Effects, Filters, Overlay Effects and LUT taps on top. Drag any preset onto a clip to instantly change its mood and style.
Step 5: Enhance Audio
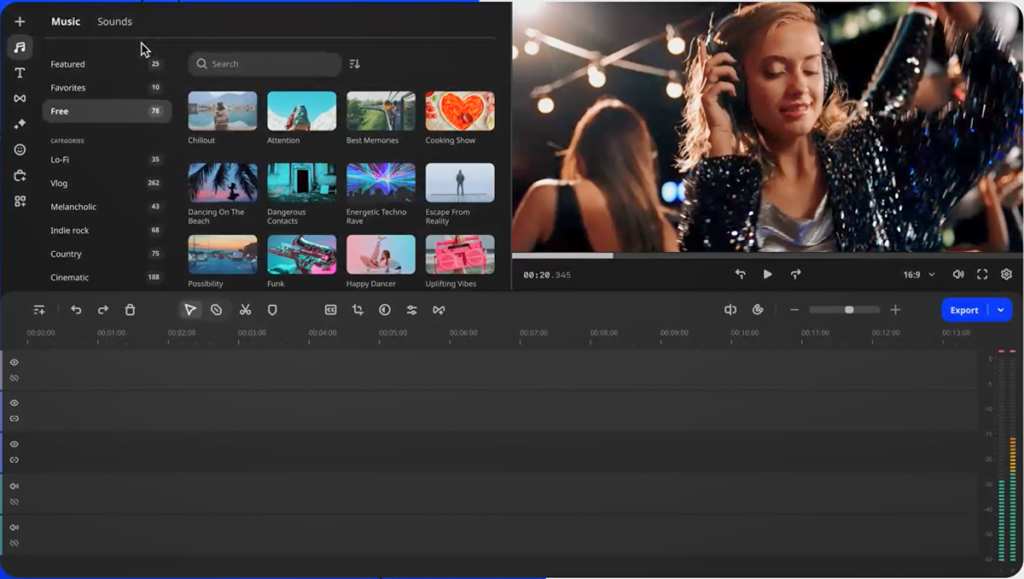
- Add Music: Import your own track or use royalty-free music from the “Audio” tab. Drag it to the dedicated audio track.
- Adjust Volume: Click on a video or audio clip and use the “Clip Settings” button in the toolbar to adjust volume, fade in/out, or change speed.
- Voiceover: Click the record icon above the timeline to record narration directly into your project.
Phase 3: Advanced Tools Made Easy
Step 6: Use Key Features in Clicks
- Color Adjustments: Click any video clip and select the “Color Adjustments” tool above the timeline. Use sliders for adjustment, or drag and drop a preset effect onto the desired clip.
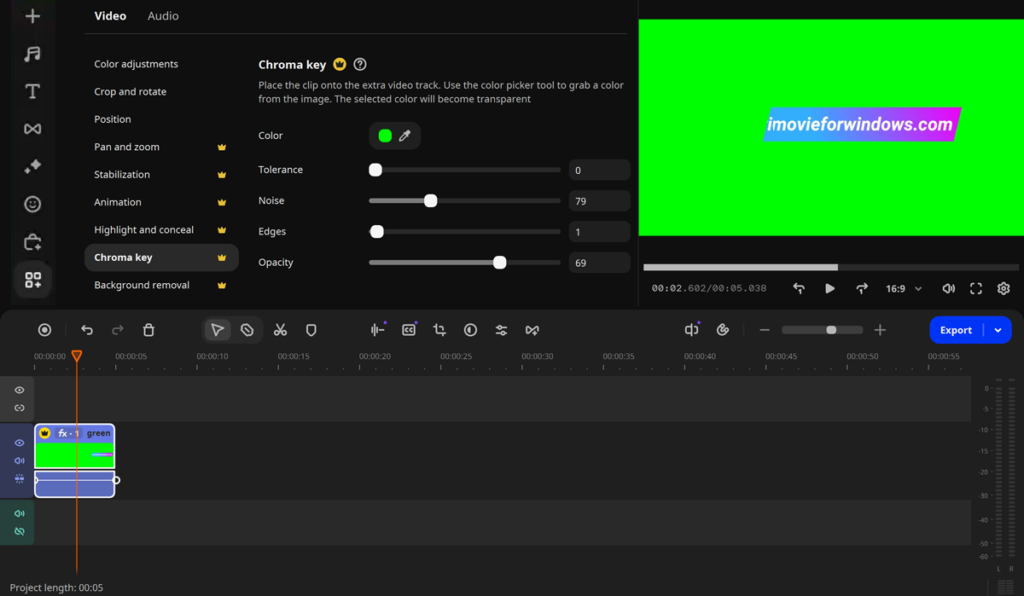
- Chroma Key(Green Screen): Place your overlay clip above a background. With the overlay clip highlighted, go to Tools > Chroma Key to open the setting panel. Use the color picker to select the green background, and watch it disappear like a magic. Use Tolerance (usually greater than 1) and other tools to make your video better.
- Stabilization & Slow Motion: Click a clip and explore the Tools tab to find “Stabilization” to smooth shaky footage and “Slow Motion” to create slow-motion effects.
Phase 4: Save & Share Your Masterpiece
Step 7: Export Your Video
Click the big “Export” button to the top right corner of the timeline. You’ll see optimized presets: Name your file, choose a folder, and click “Start.” Movavi will render your final video efficiently.
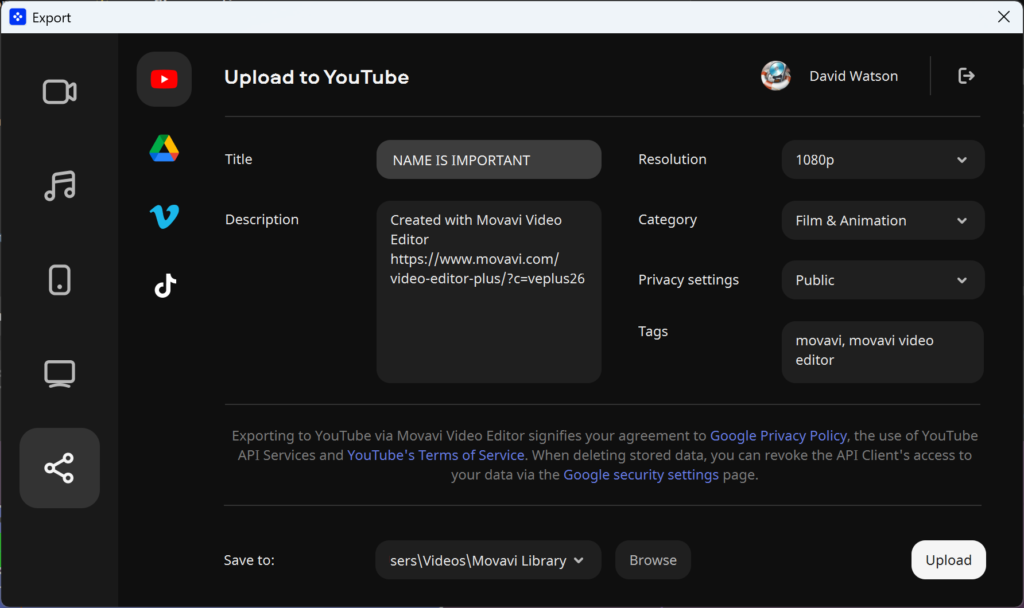
- For Social Media: Choose “YouTube,” “Vimeo,” or “TikTok” for perfect formatting.
- For Devices: Select “iPhone” or “Android.”
- For Full Quality: Choose “Save as video file” and select a format like MP4 and resolution up to 4K.
You’ve Just Learned Video Editing with iMovie for PC
See? You don’t need to be a pro to make professional-looking videos. Movavi Video Editor simplifies the complex, so you can focus on telling your story. That’s why so many satisfied users considered Movavi Video Editor as the best equivalent to iMovie for PC. They won’t be wrong.